
氣炸‧片皮鴨 自製甜麵醬 比依6.4L 氣炸防燶法 Airfried Peking Duck 【老娘的草根飯堂】
氣炸‧片皮鴨 自製甜麵醬 比依6.4L 氣炸防燶法 Airfried Peking Duck 【老娘的草根飯堂】
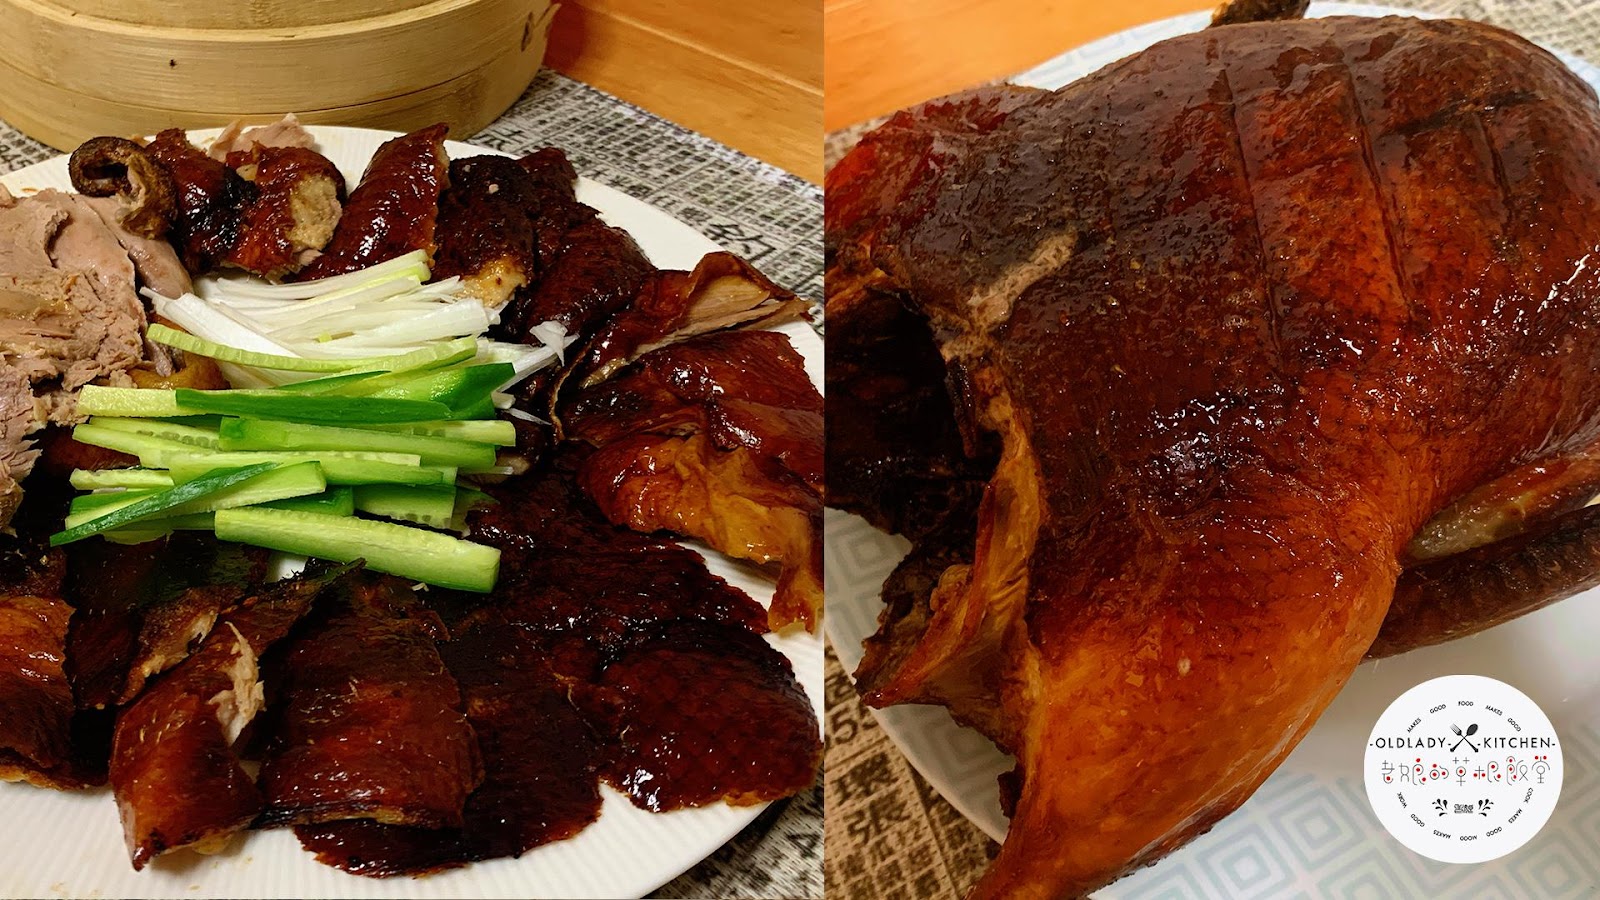
今日我地做既係氣炸鍋必試item ,
片皮鴨
呢個我做左三次,第一次太燶,
第二次成功左再唔記得影相
所以做左三次,
除左片皮好熱好辣手之外,其他步驟其實極簡易,我覺得都值得一試
材料 Ingredients
米鴨 1隻 Duck 1
上皮水
蜜芽糖 2大匙 Maltose 2 tbsp
白醋 半大匙Vinegar 0.5 tbsp
京蔥 一條 Green Onion 1
小青瓜 兩條 Mini Cucumber 2
甜麵醬
醬油 3大匙 Soy Sause 3 tbsp
糖 4.5大匙 Sugar 4.5 tbsp
麻油 1.5大匙 Sesame oil 1.5 tbsp
胡椒粉 1.5小匙 White pepper powder 1.5 tbsp
糯米粉 1.5大匙 Glutinous rice flour 1.5 tbsp
水 3大匙 Water 3 tbsp
煮法
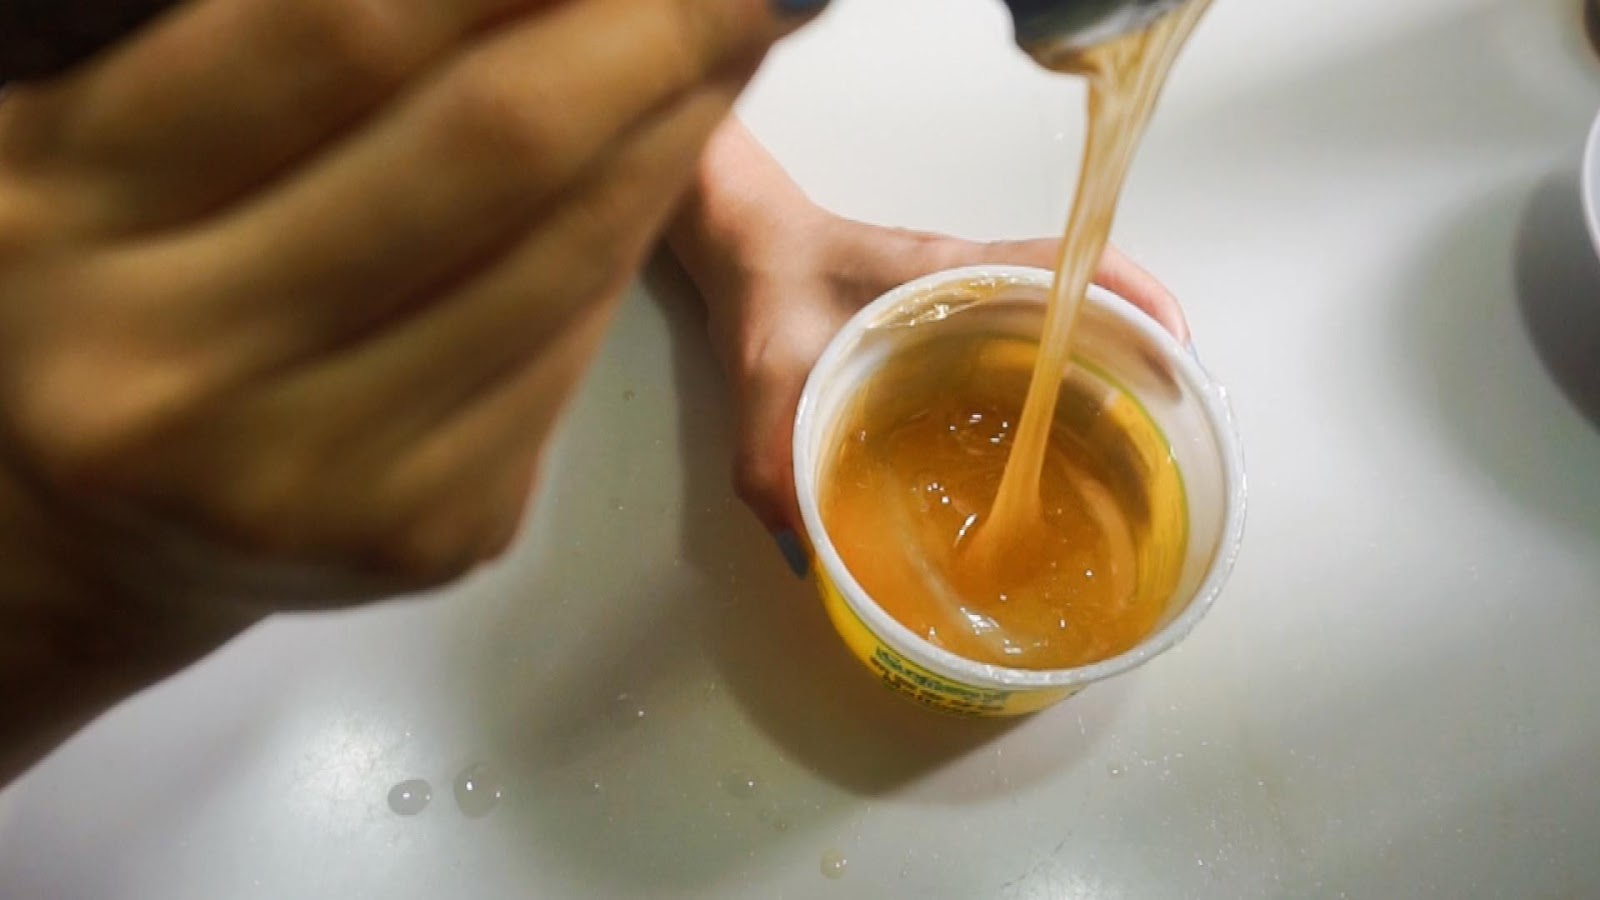
先做上皮水,蜜芽糖加白醋先拌勻
Add white vinegar into maltose and stir until the maltose is fully dissolved
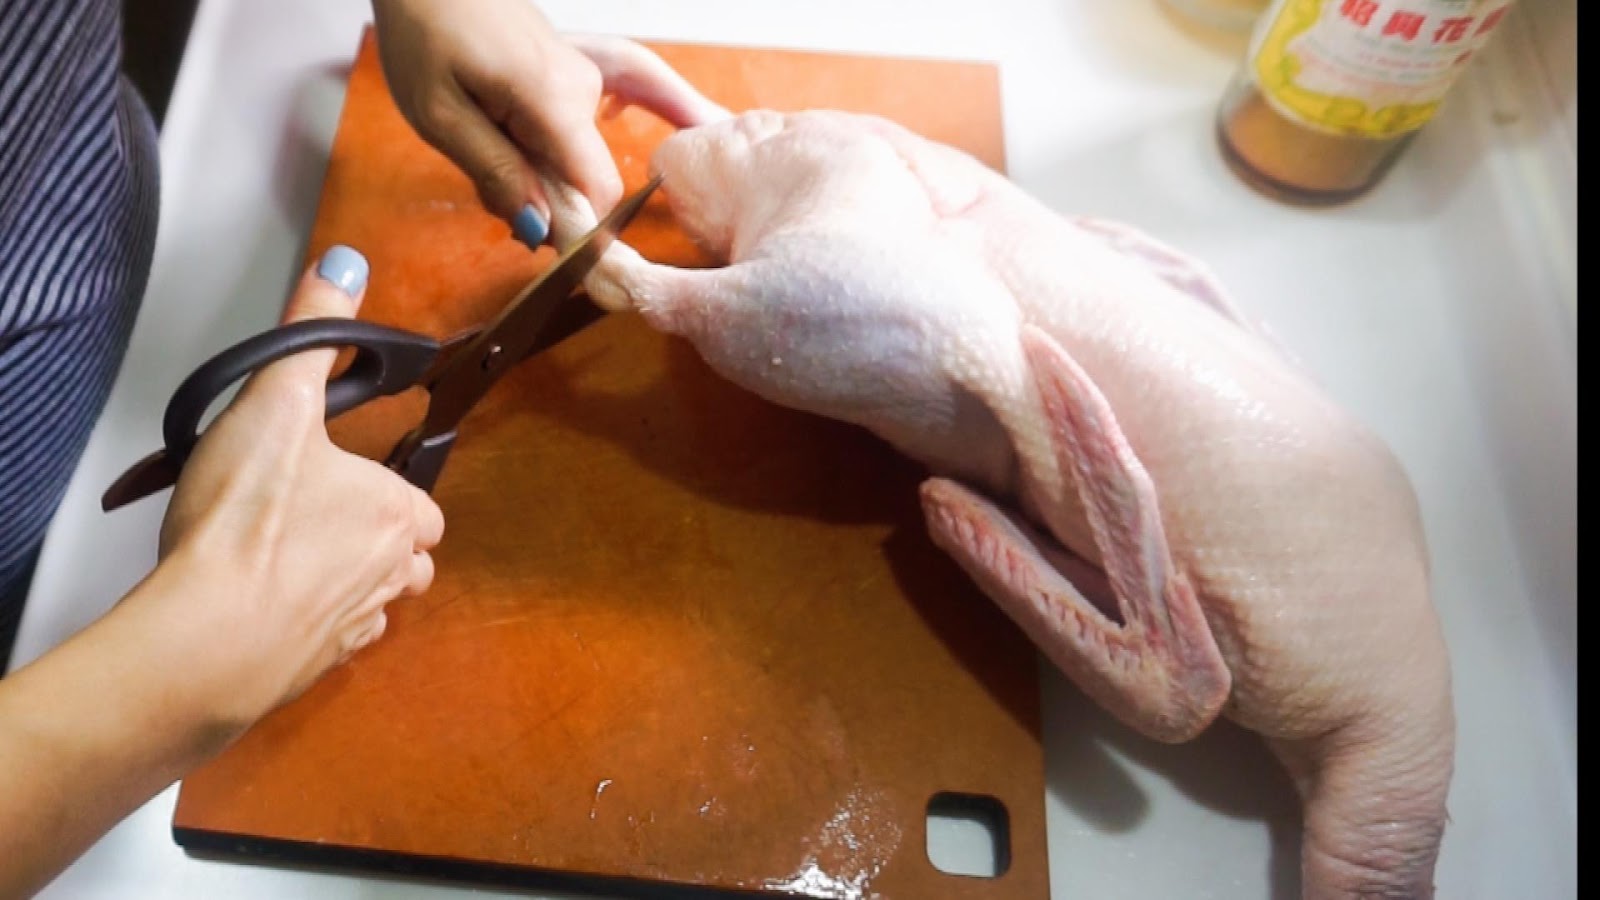
之後米鴨洗淨,
Wash the duck
先剪走鴨腳
Cut the duck feet first
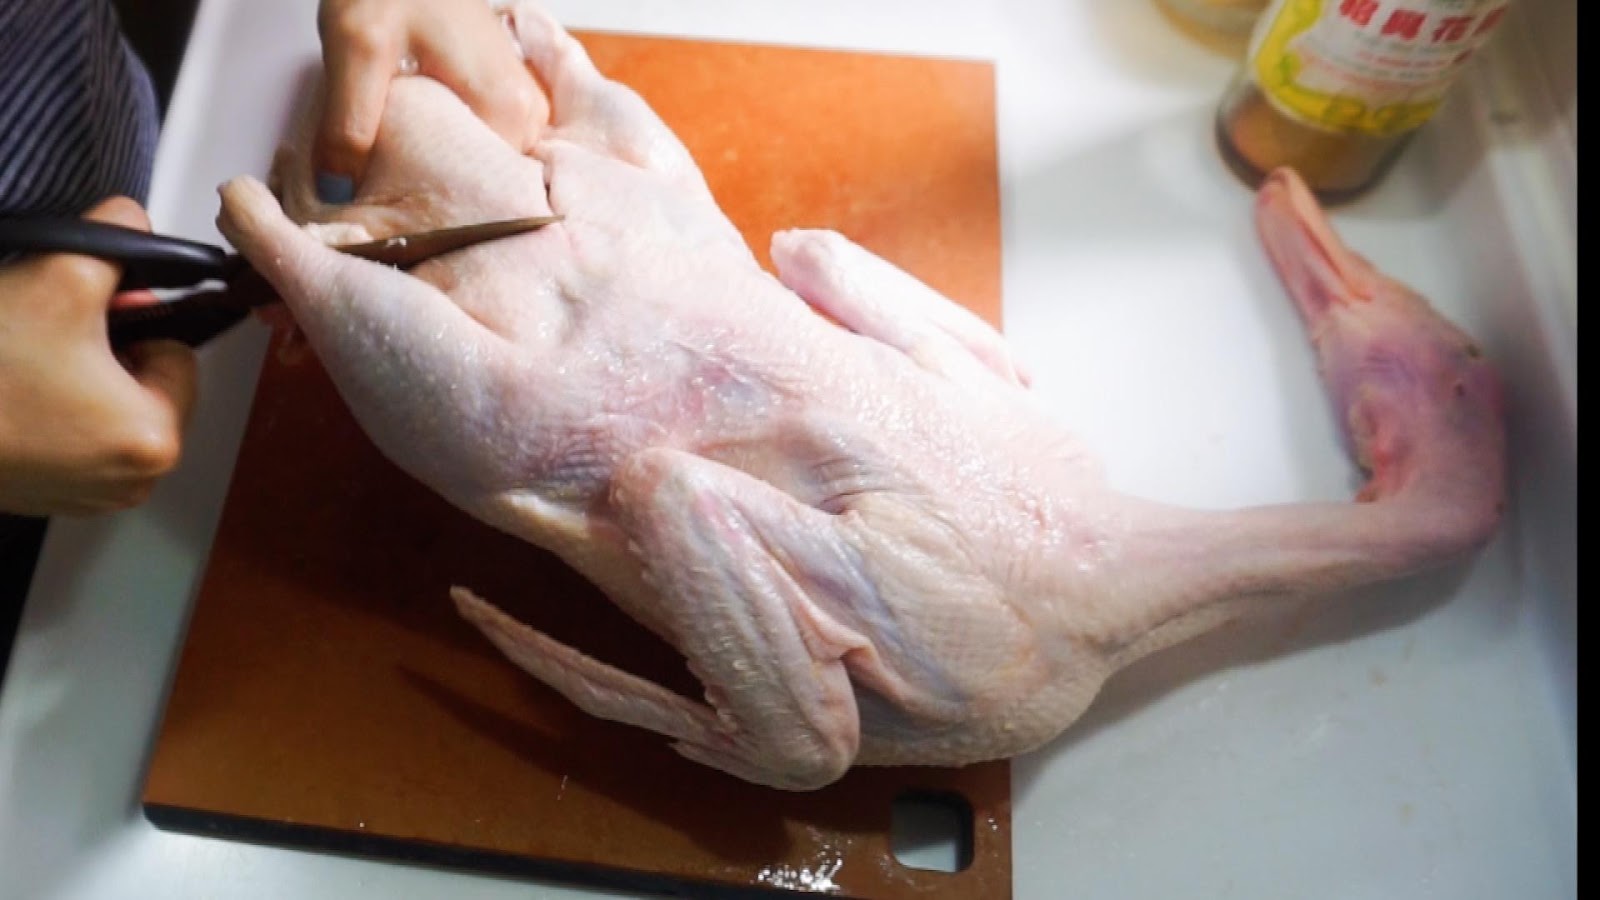
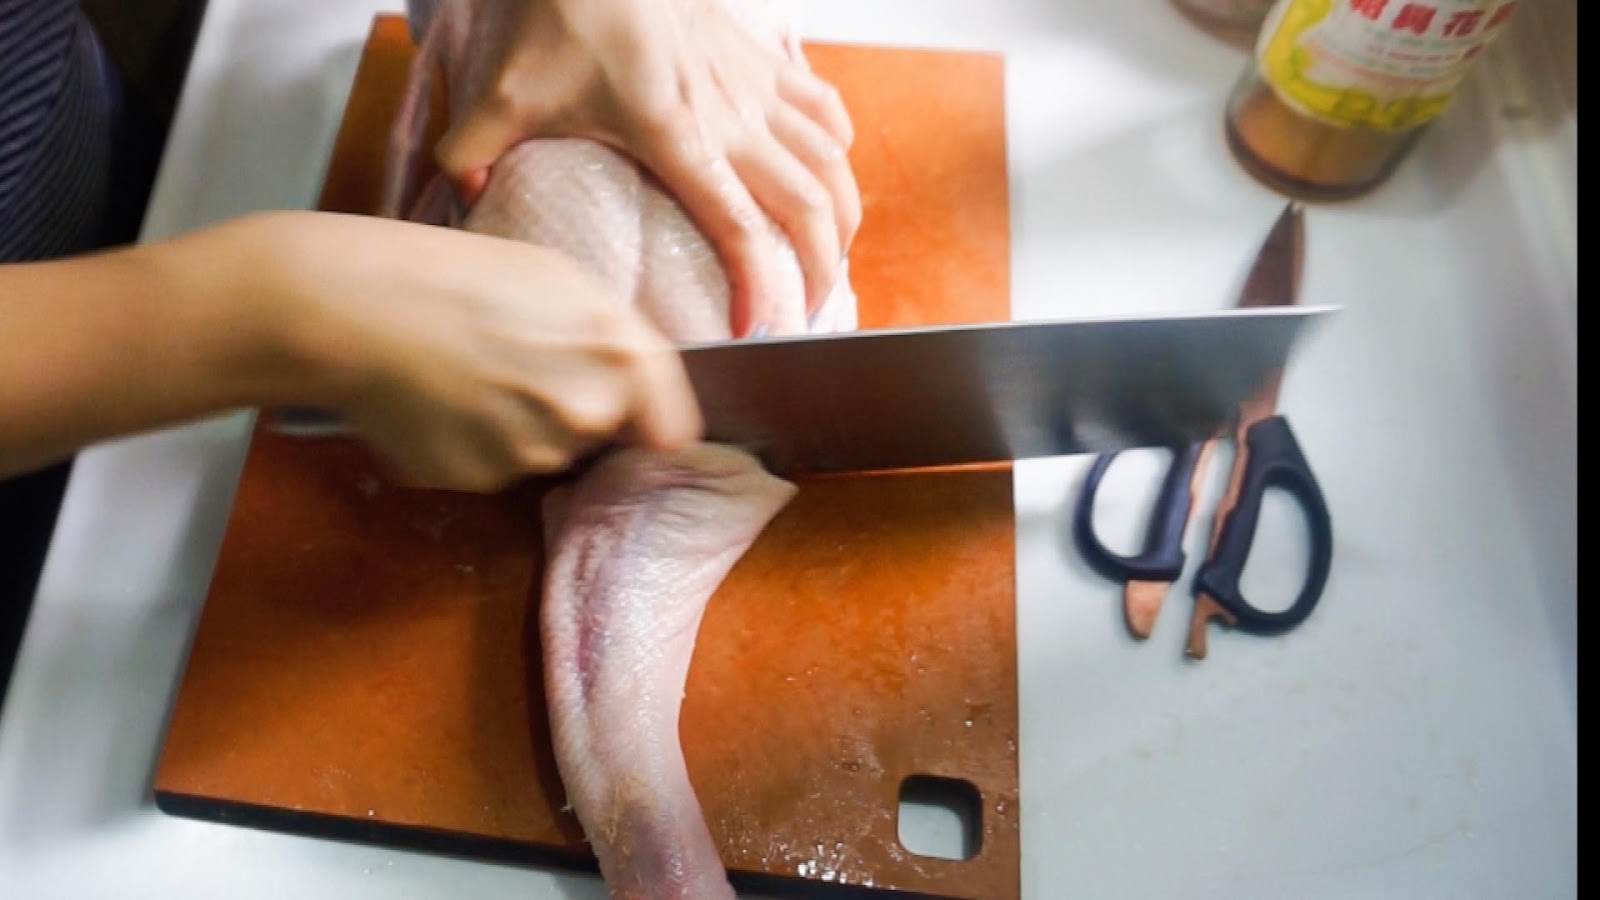
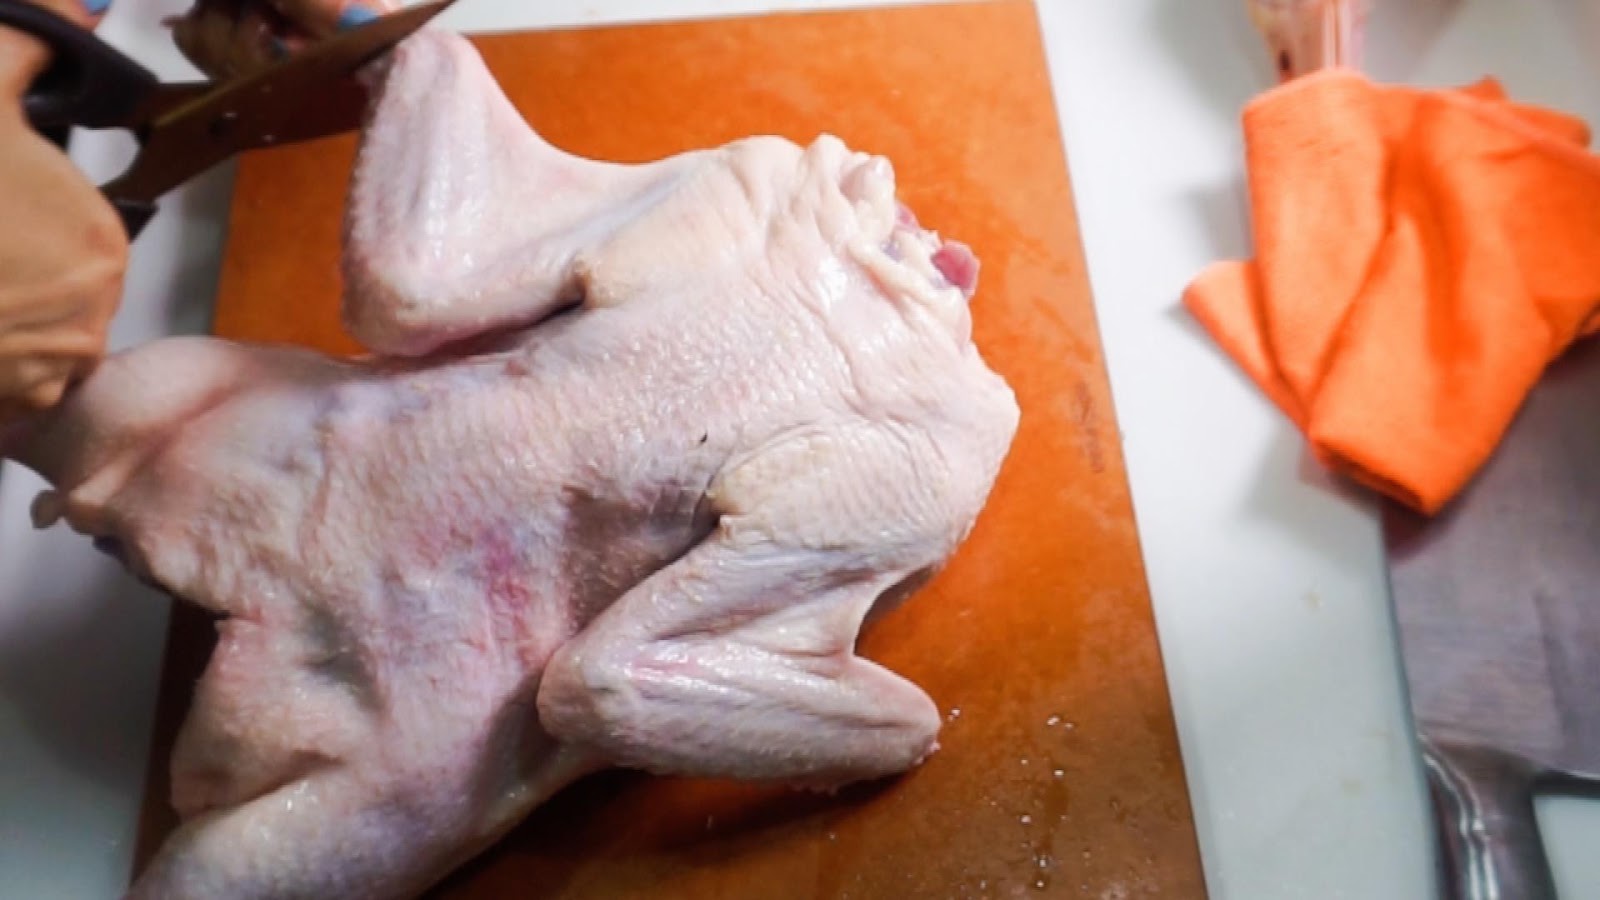
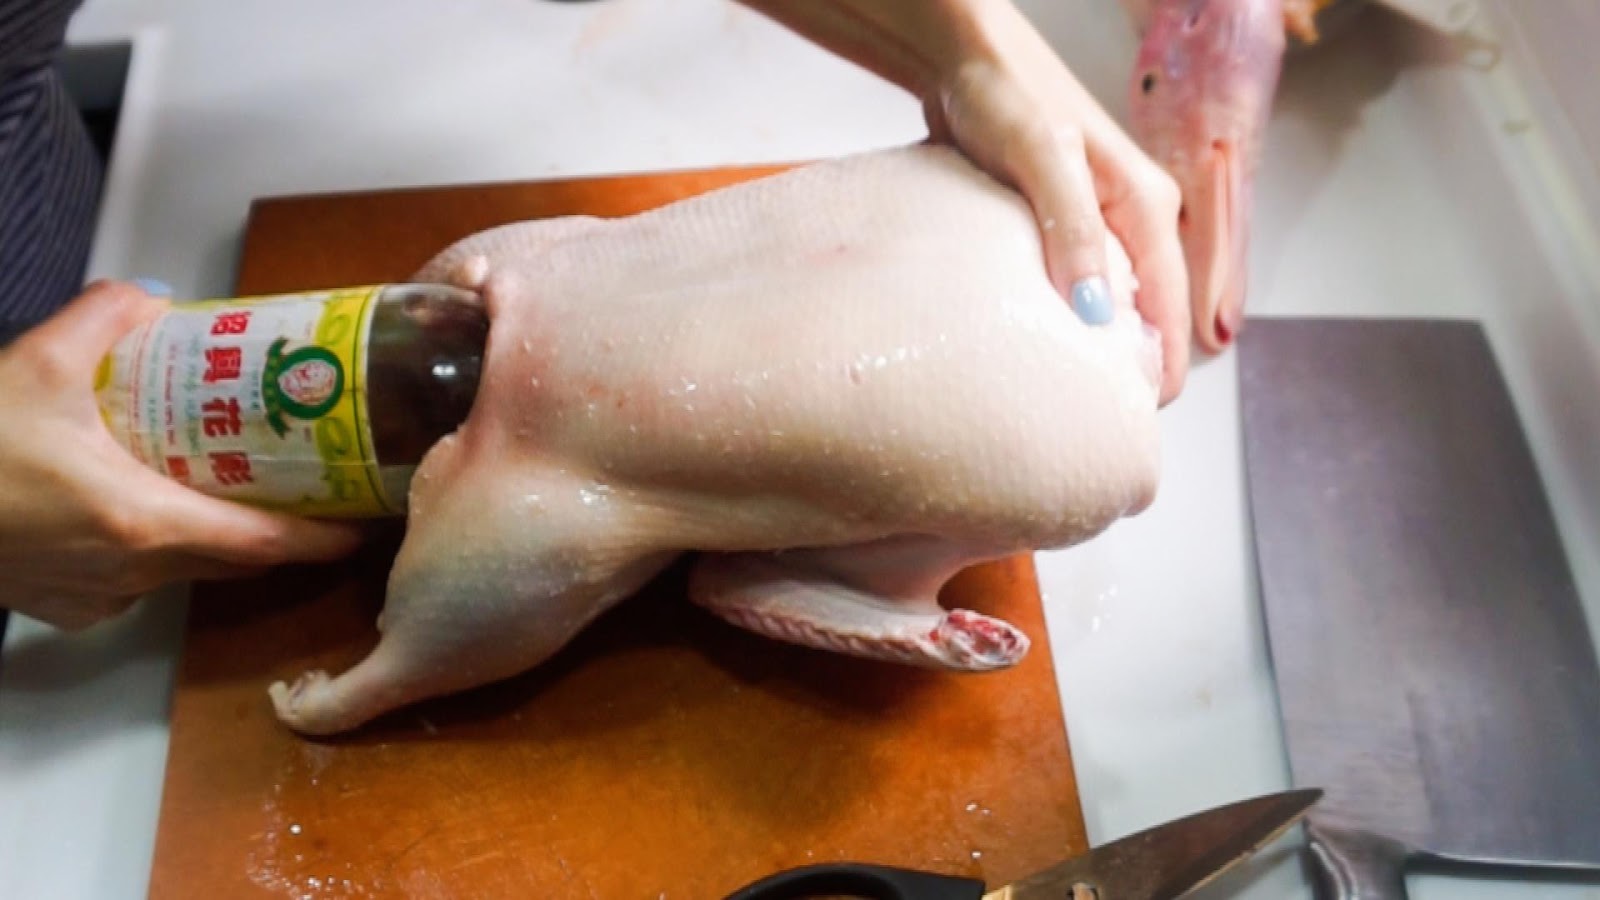
再剪走鴨尾,切走頭和鴨翼尖,插在玻璃樽上
Cut off the duck tail, then cut off the head and wing tip, insert it on the glass bottle
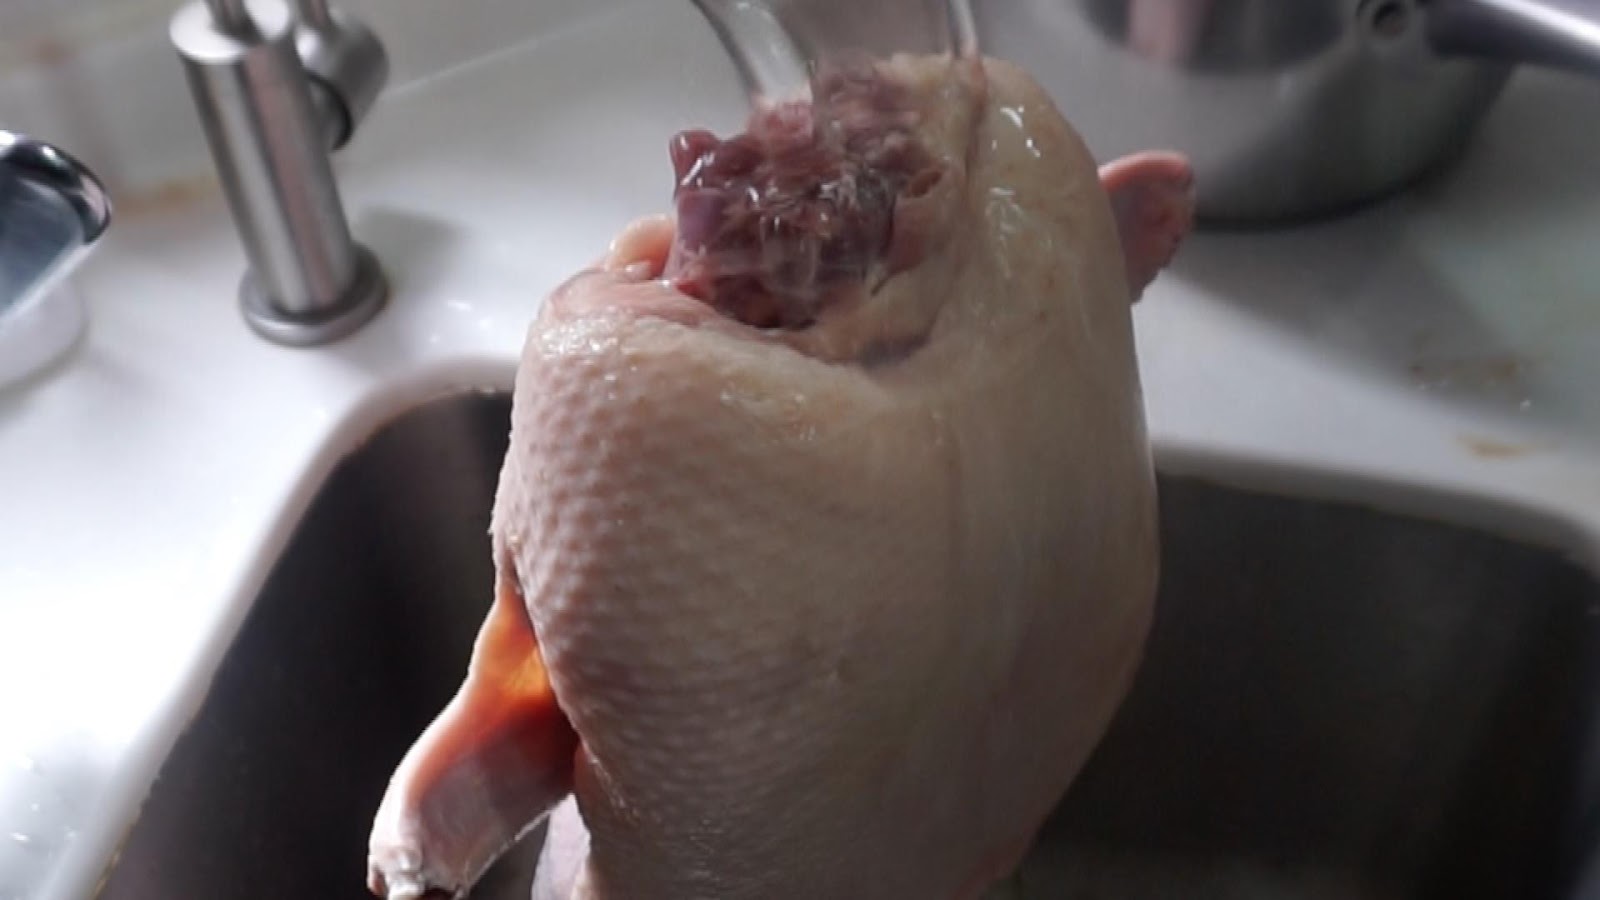
將熱水淋上鴨身
Pour hot water on the duck body

掃上上水皮,之後一直插在玻璃樽上風乾最少6小時
Sweep on the mixture of white vinegar and maltose,
dried at least 6 hours

這時可以做甜麵醬
將所有材料先拌勻倒入煎鍋
Mix up all the ingredients
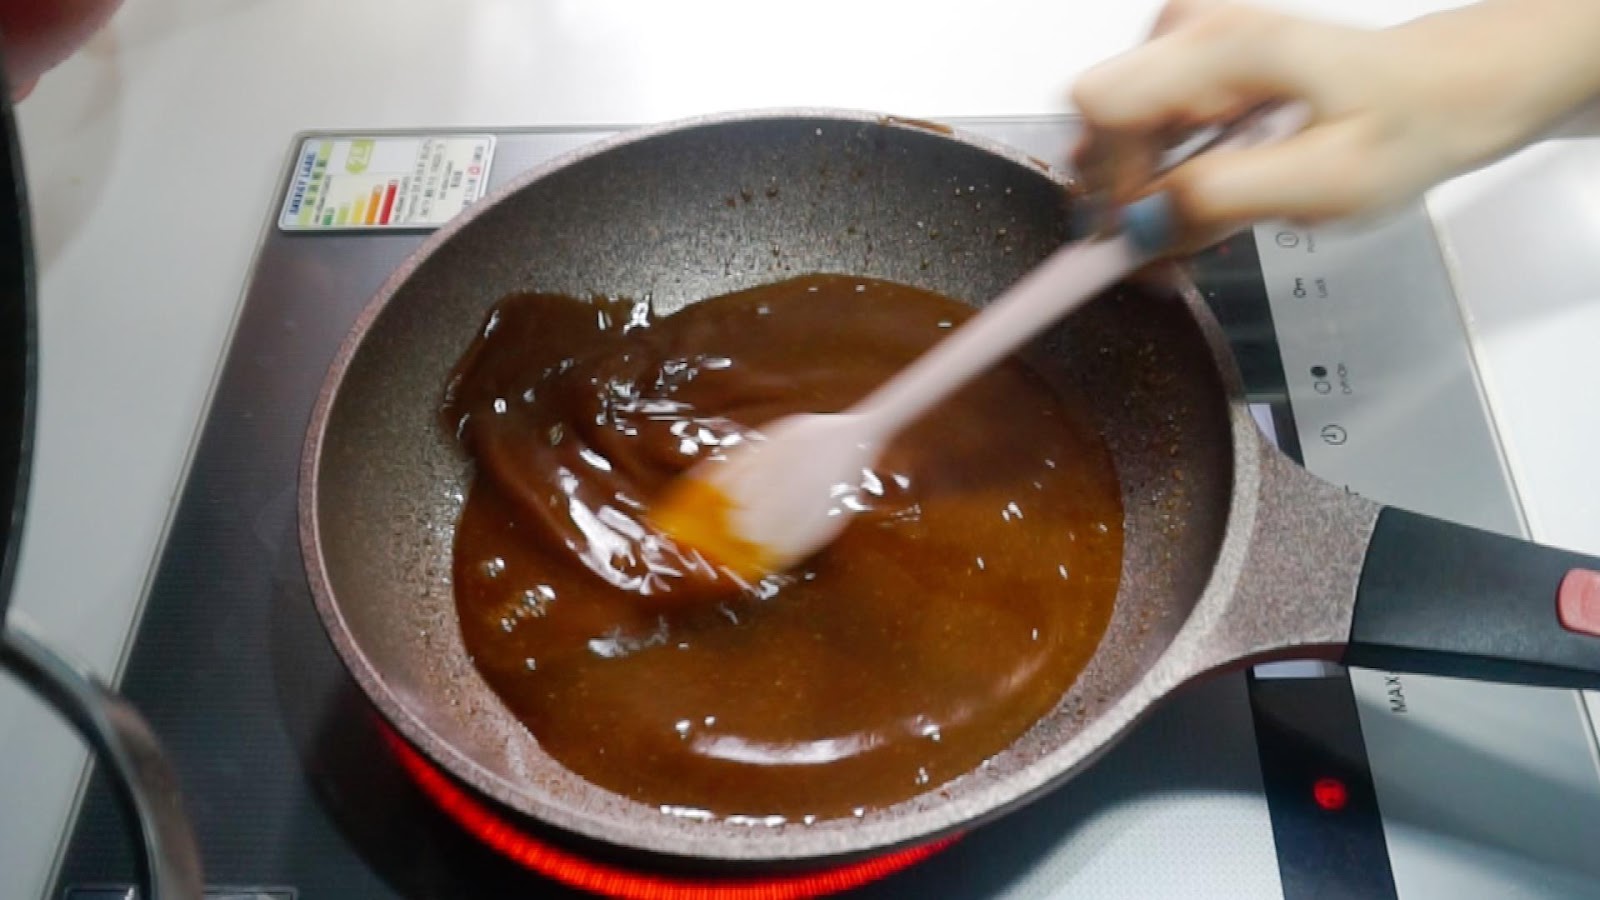
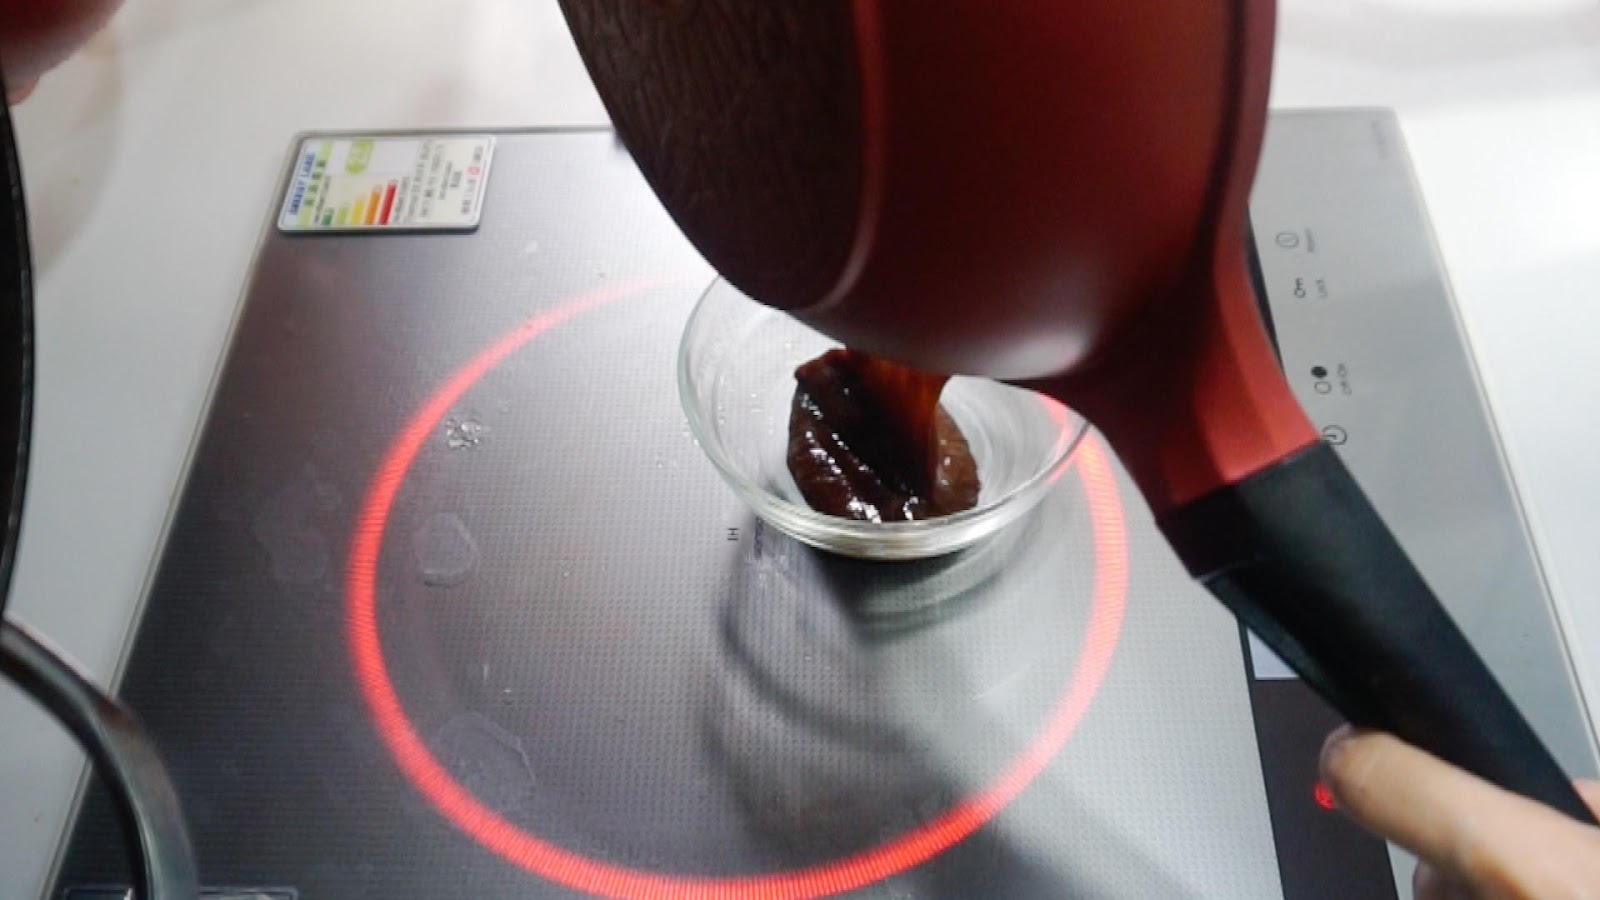
中小火慢慢煮稠即可
Slowly cook until thickened in middle heat
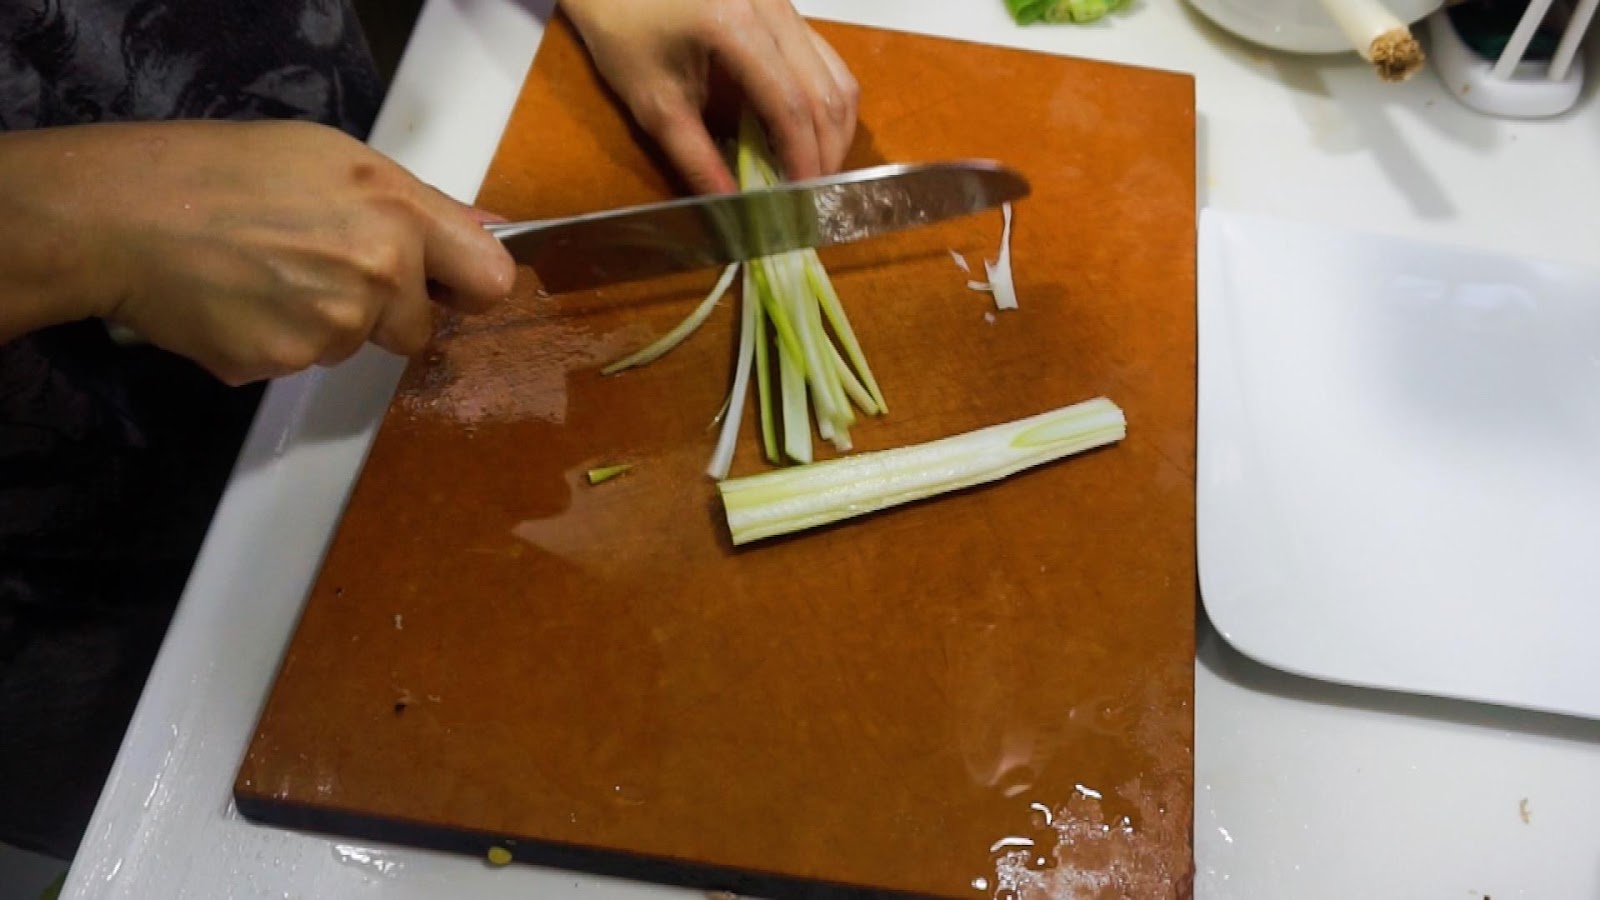
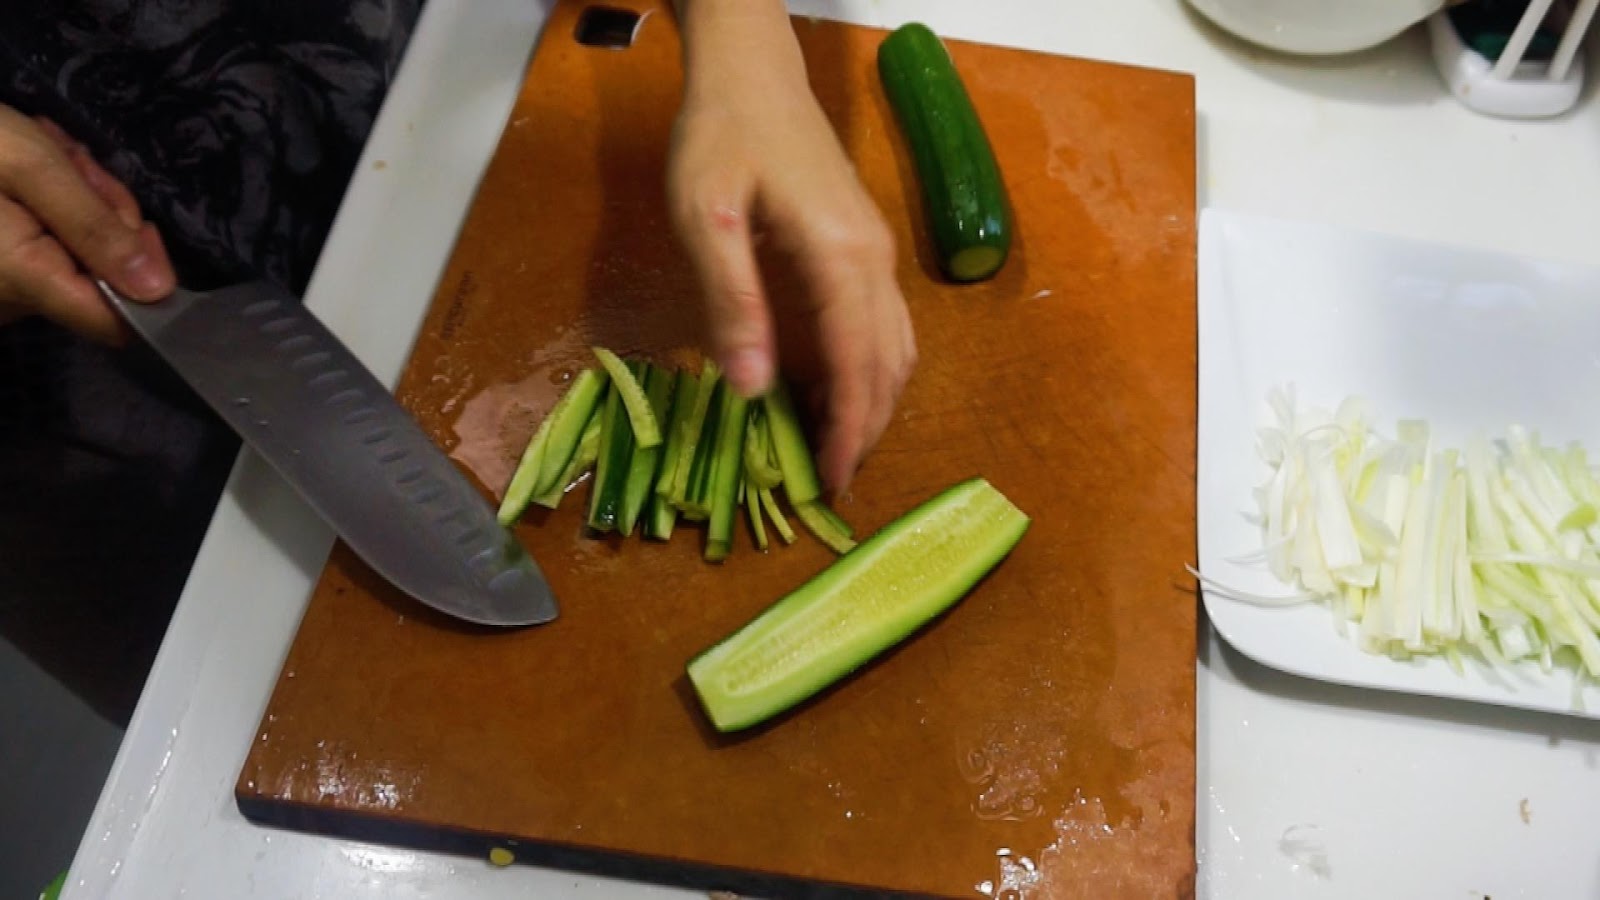
另外可以將京蔥、青瓜洗淨切絲備用
wash and shred the green onion and cucumber

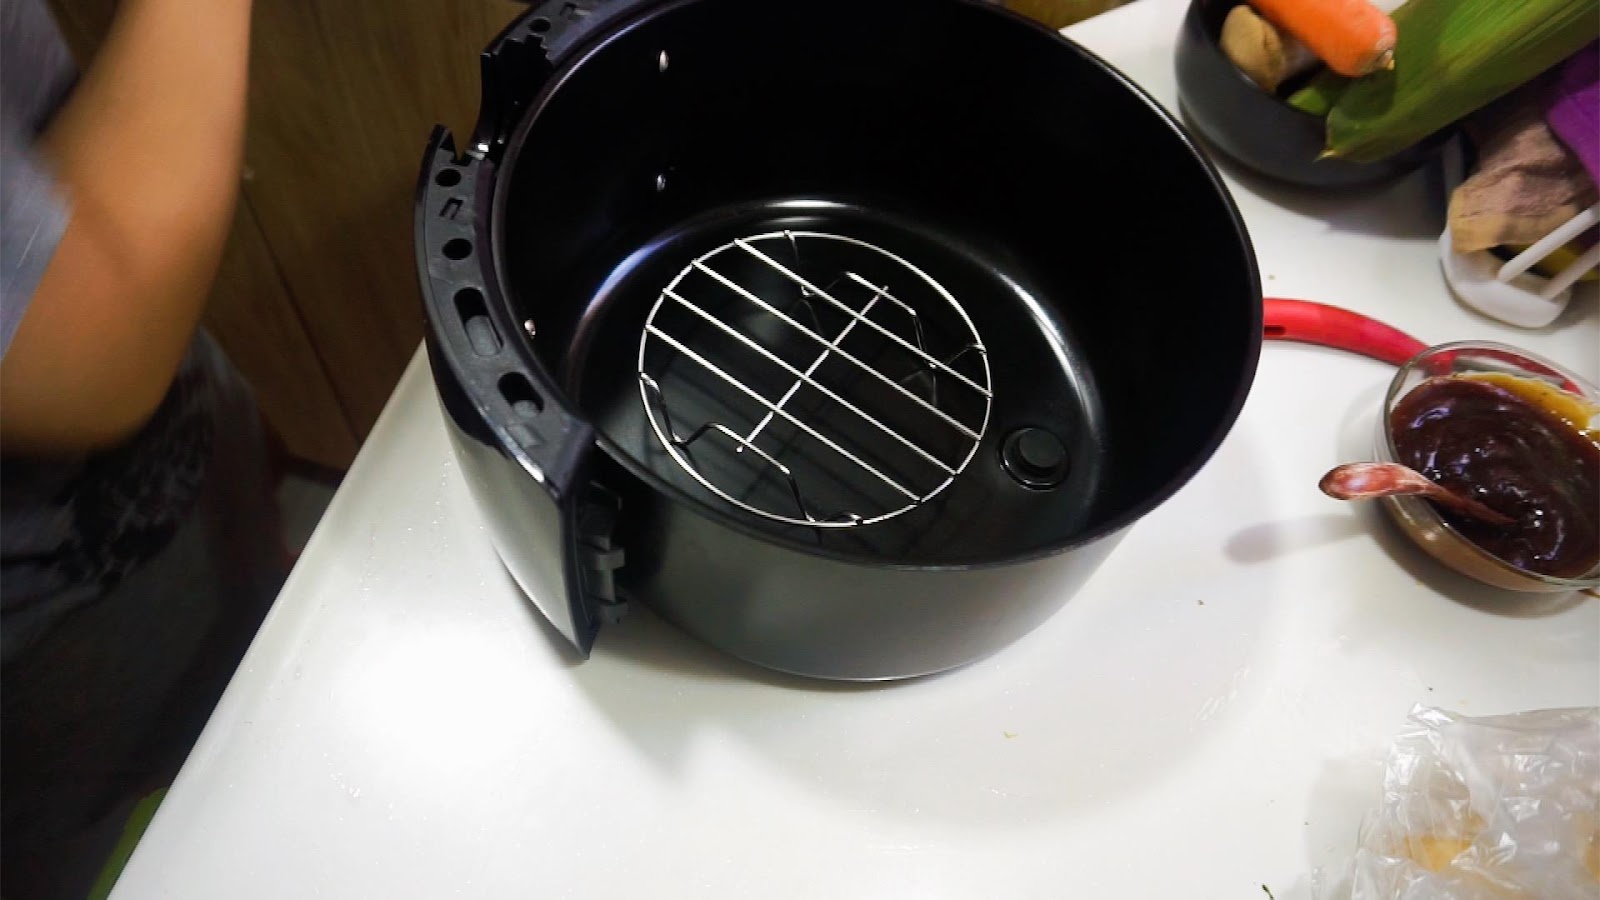
先將氣炸鍋的手握層拿走,放上矮身的蒸架
Remove the grip layer of the air fryer and put on the short steaming rack
*因為比依6.4L連手握層會令鴨身太近發熱線,會烤焦的
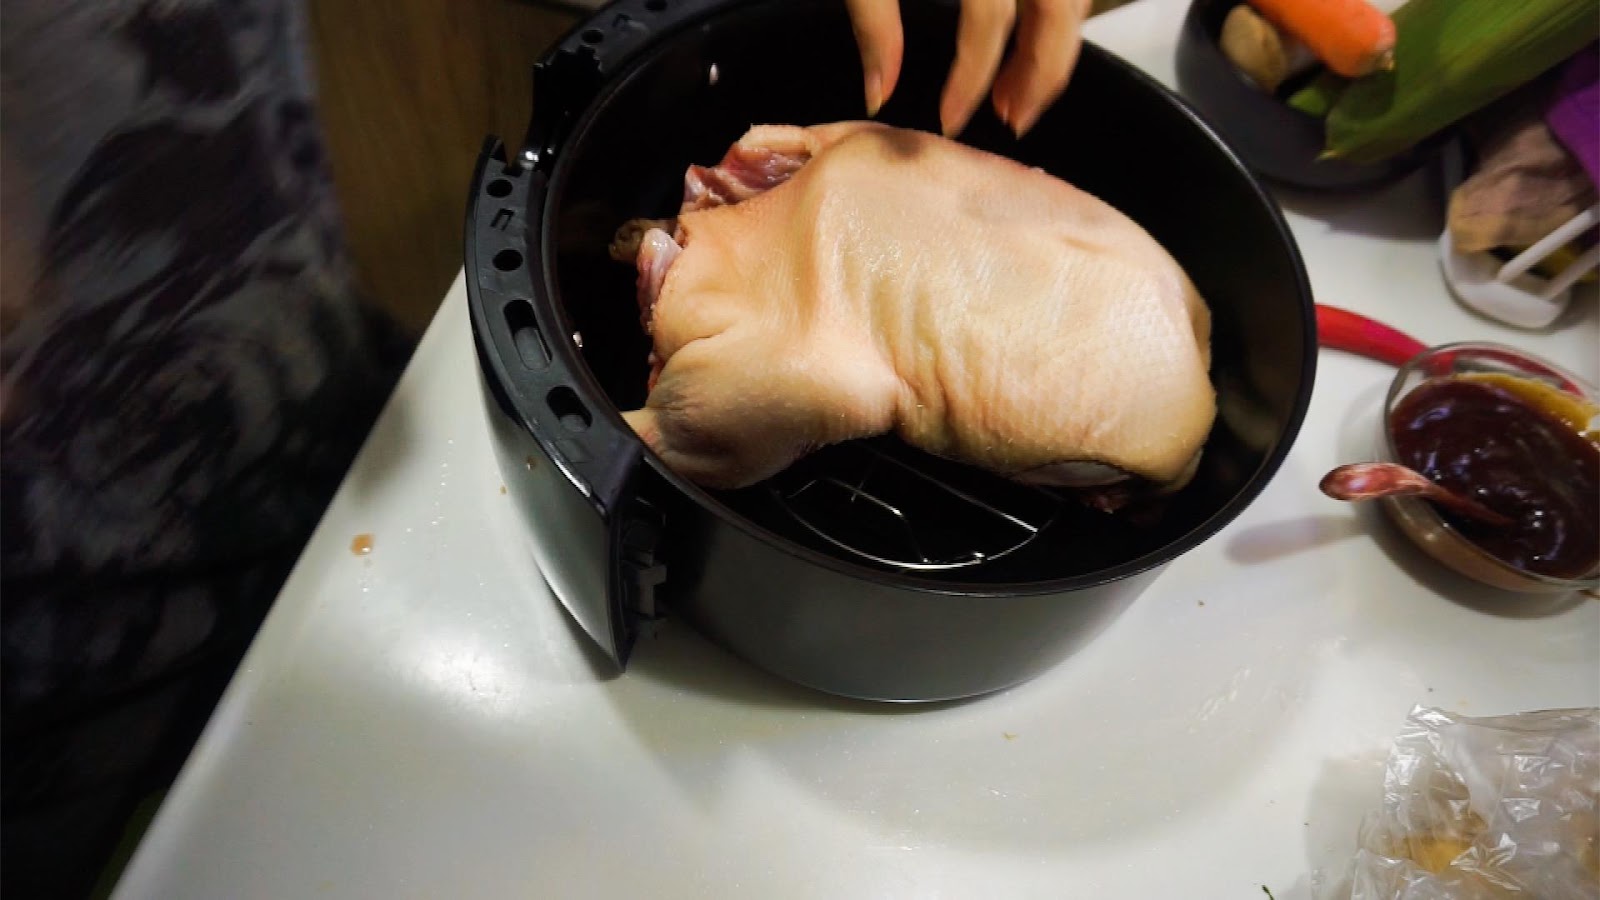
放入米鴨,先180度25分鐘,之後翻面轉160度30分鐘
Put in the duck, 180c for 25 minutes first, then turn over 160c for 30 minutes
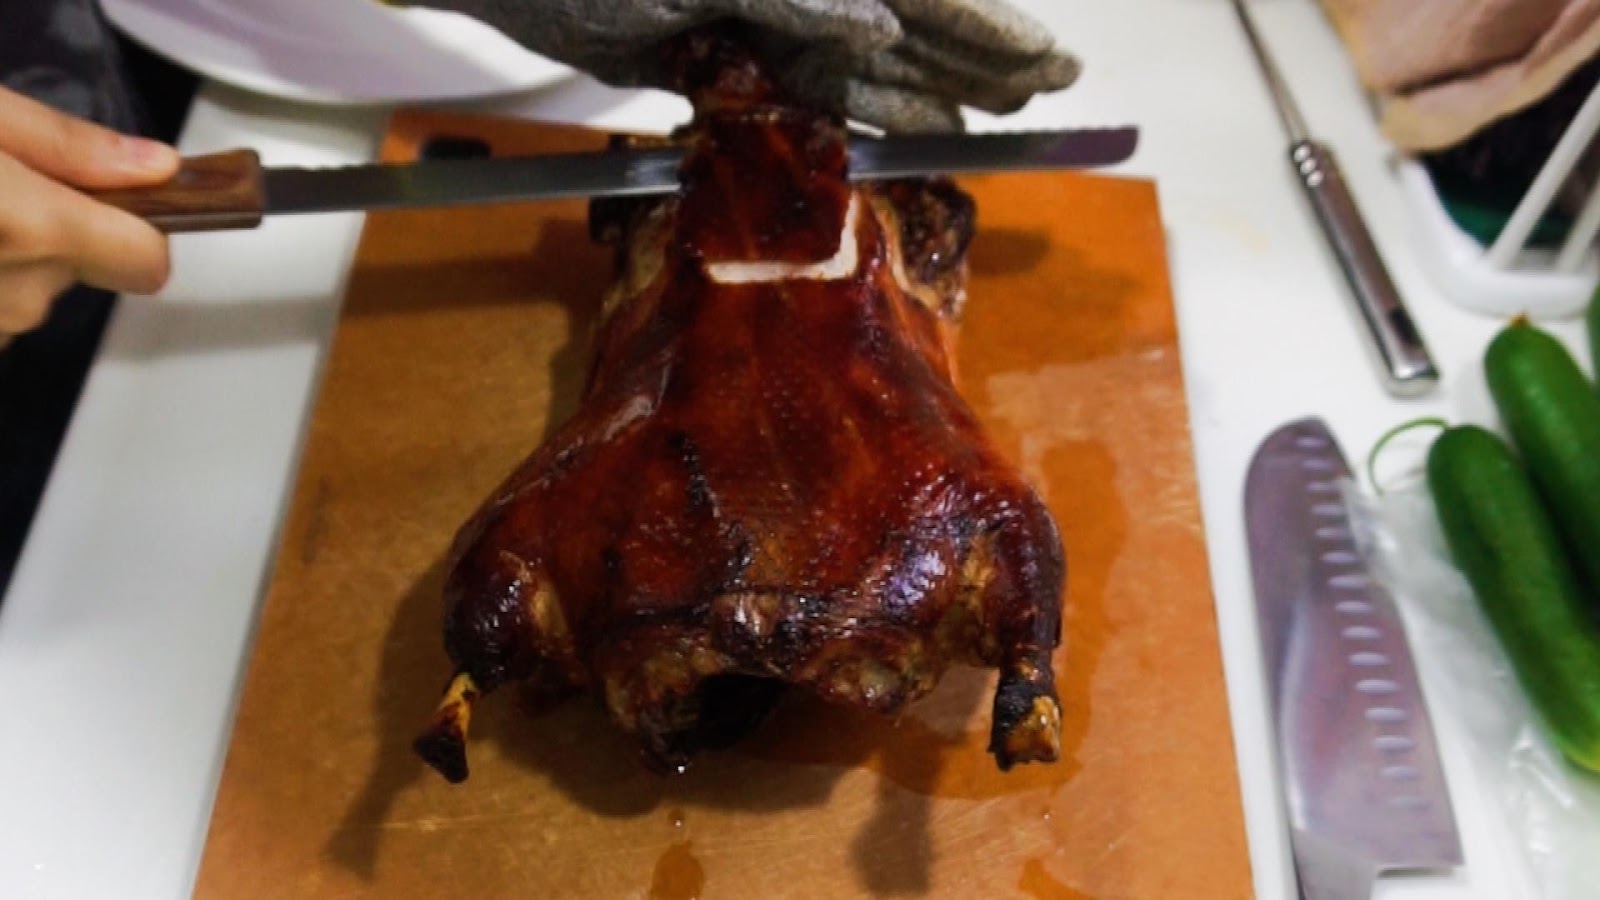
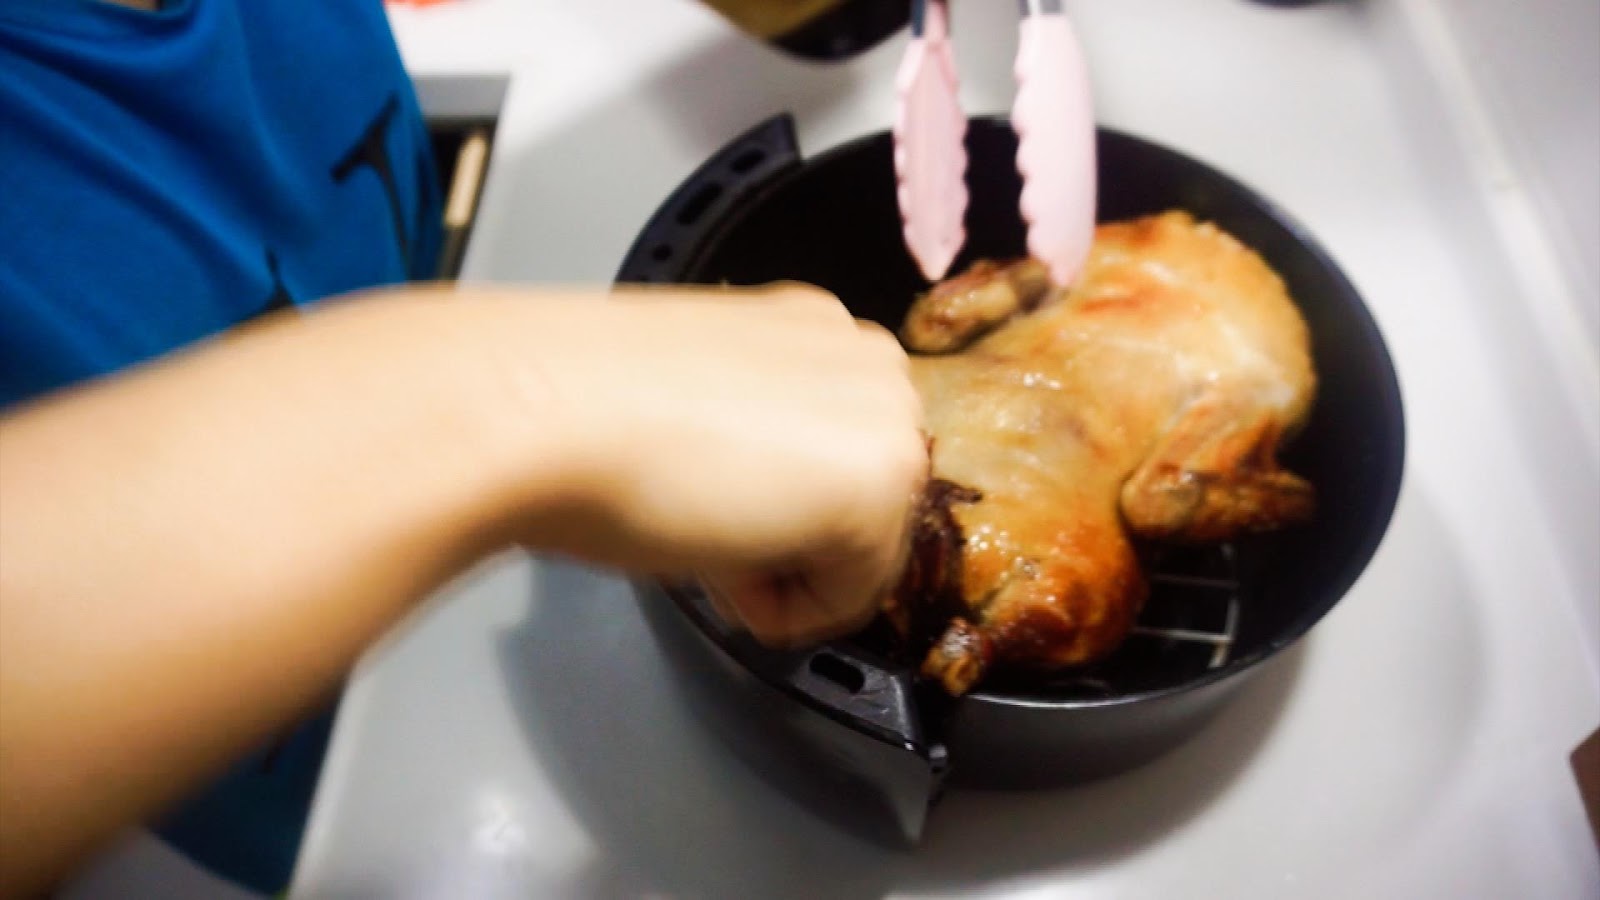
烤好後片皮即成

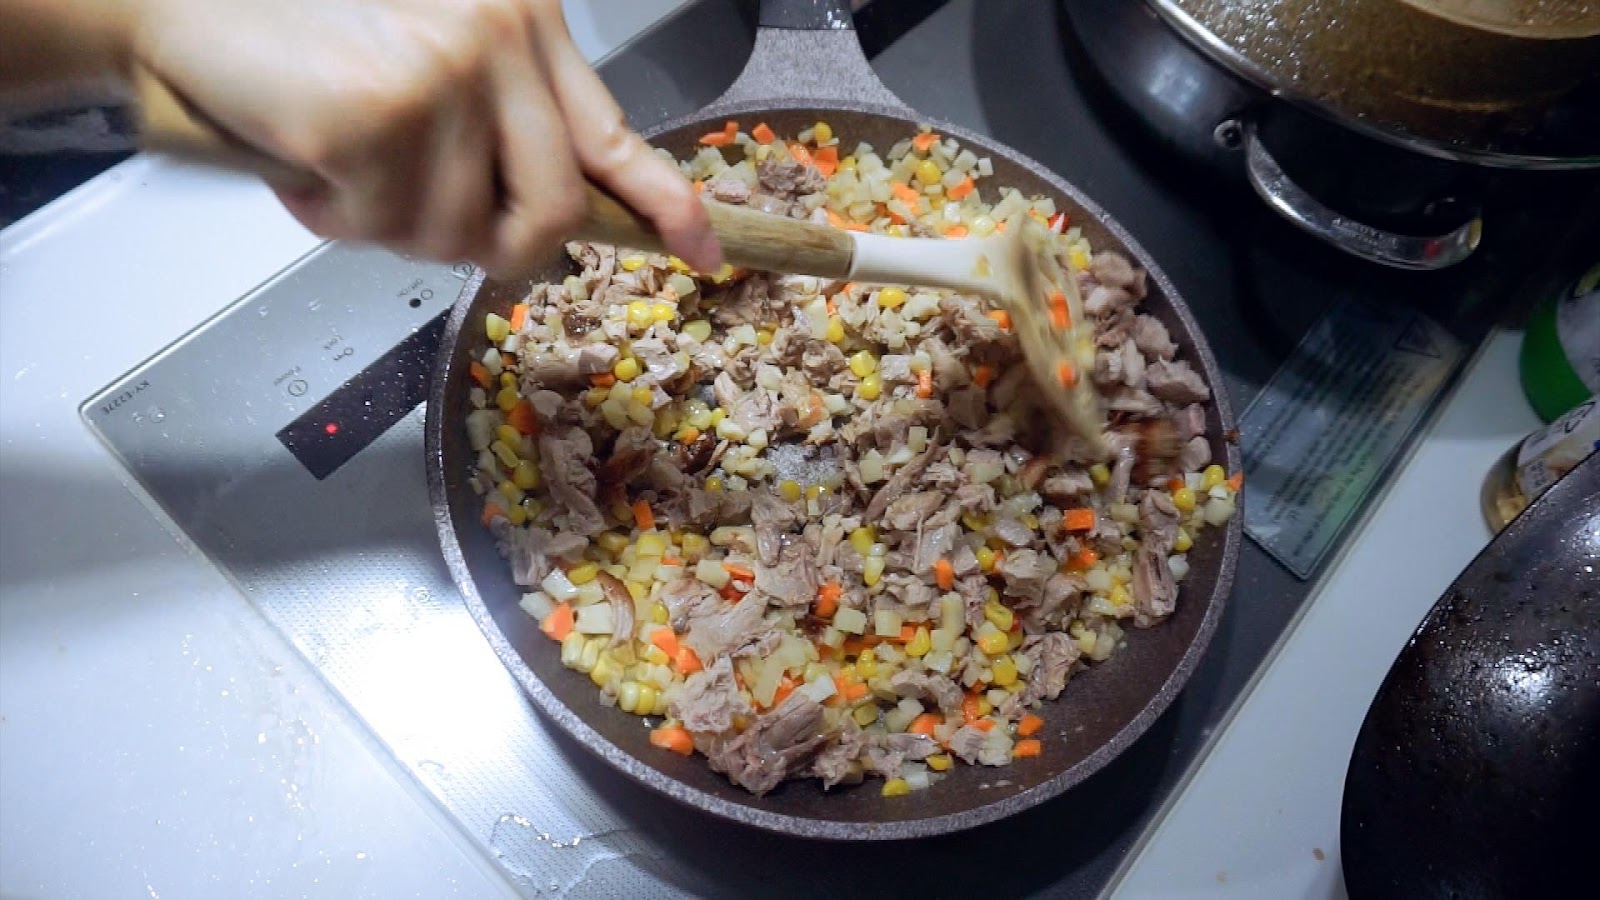
*片皮後可以起鴨肉炒雜碎,一鴨兩吃
雜碎配件以爽脆和吸味為主,我這次用了沙葛、甘筍、雞脾菇、粟米
用氣炸後的鴨油起鍋,下配料及鴨肉炒勻,之後下,胡椒粉,鹽、醬油、少少老抽上色發蠔油炒香即成


沒有留言: